
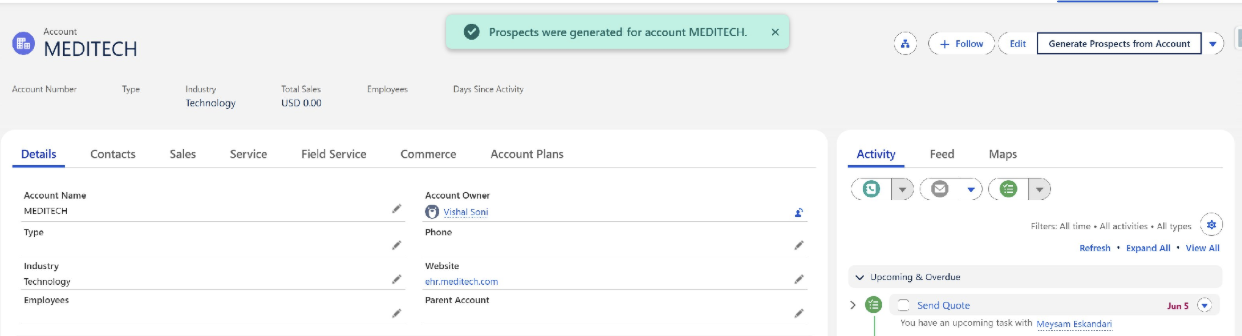
You completed the setup wizard. You connected to ZoomInfo. You assigned the agent to an account record and clicked Generate Prospects from Account. Nothing happened. No errors. Just silence.
This is the experience most practitioners hit when they deploy Salesforce's Agentforce Prospecting Agent for the first time, not because the agent is broken, but because the configuration gap between the wizard and production-ready behaviour is real and undocumented.
Salesforce announced the Agentforce Prospecting Agent as part of its April 2026 Sales Cloud release. They positioned it as an always-on prospecting partner that autonomously researches target accounts, qualifies them against your ICP, and surfaces ranked prospects directly in CRM. The pitch is compelling, and having now built and tested this in a live org, I can confirm the capability is real.
But getting there took more than following the setup wizard. This blog documents the configuration gotchas, the architectural decisions that matter, and the specific things you need to get right before a single prospect shows up.
This guide walks through the key setup steps required to get the Agentforce Prospecting Agent working in Salesforce. It covers the org requirements, account report setup, ZoomInfo connection, Agentforce Builder updates, ICP configuration, and the checks needed before running your first prospect generation test.
If you're working in a Salesforce Developer Org (SDO) and can't find the Prospecting Agent template, you're not imagining things. The agent is not available on older SDOs. You need a recently provisioned org that falls within the April 2026 release window.
If your SDO predates that window, spin up a new one before troubleshooting anything else. Time spent debugging a missing feature flag on an old org is time wasted.
During configuration, the wizard asks you to point to a Salesforce Accounts report. This report defines the universe of accounts the agent is allowed to work on.
Recommendation: Create a fresh, unfiltered Accounts report with no criteria applied. This gives the agent access to your full account base. If your use case requires narrower scope: a specific territory, segment, or account tier and build those filters into the report.
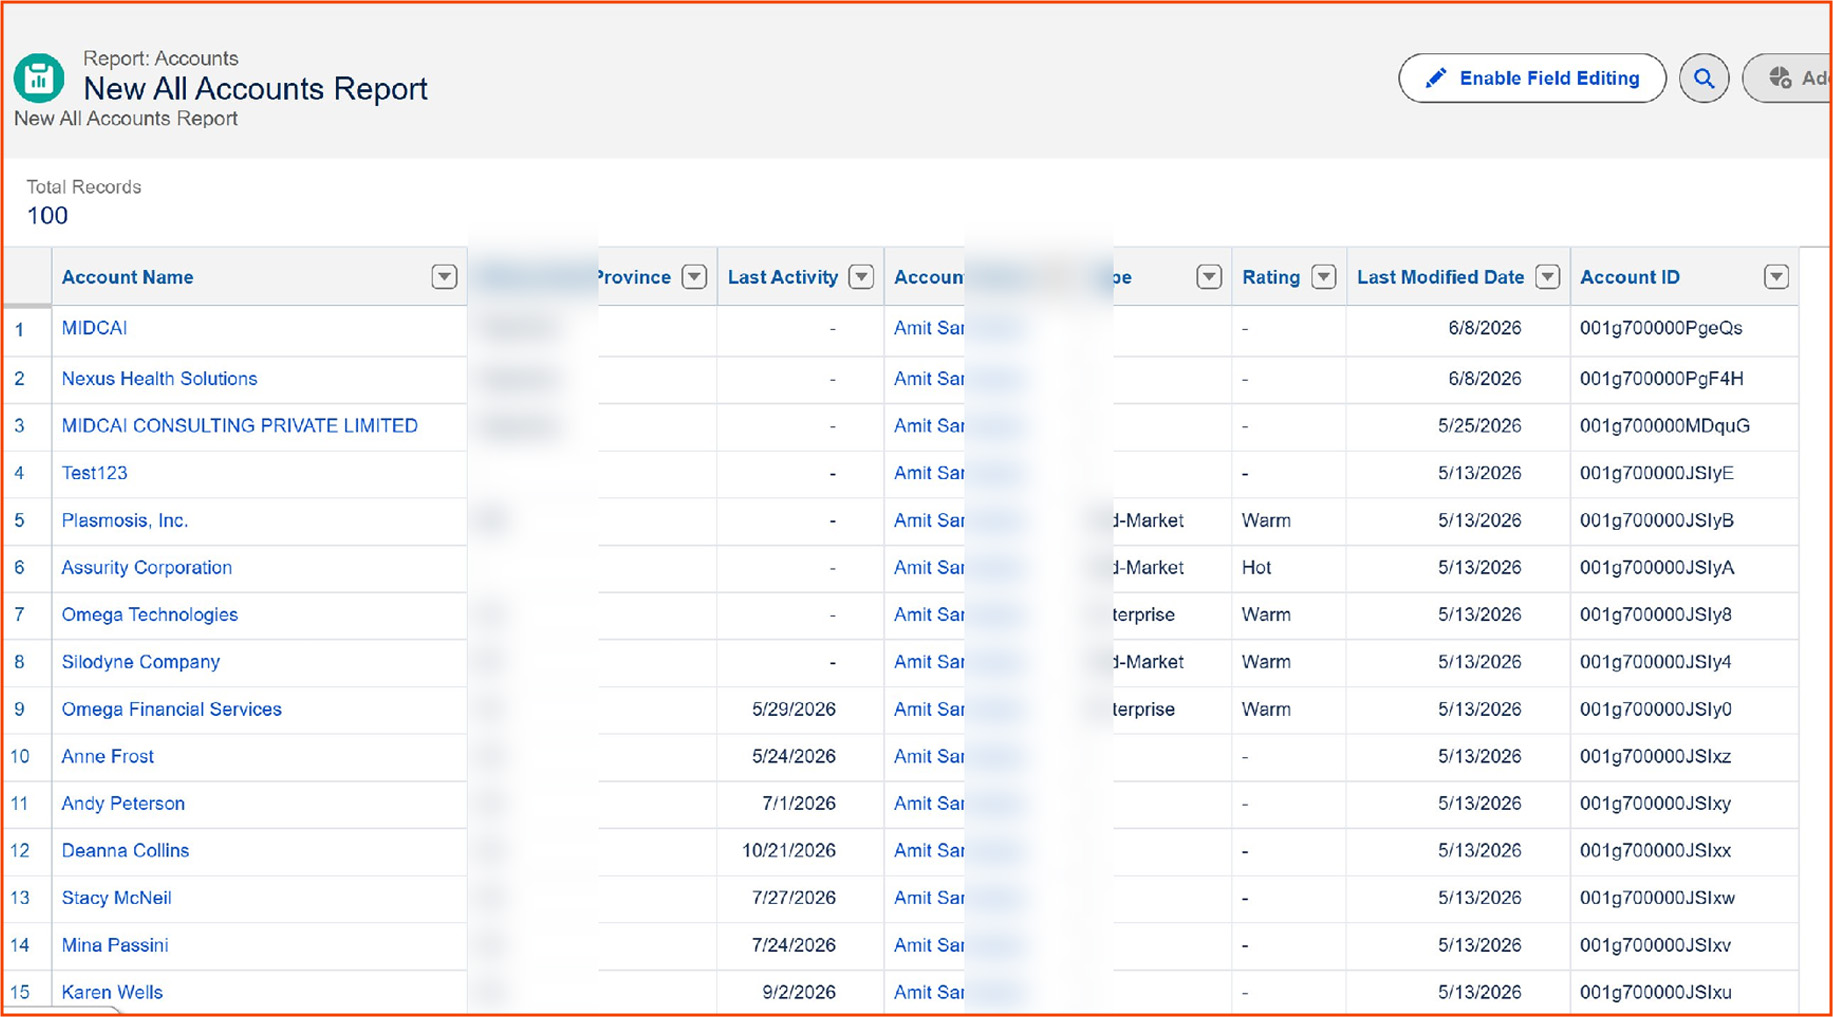
One important point: the selected account must be present in this report for the agent to run on it. If someone clicks "Generate Prospects from Account" on a record not included in the report's result set, the agent will not execute, no error, just silence.
The official Salesforce Help documentation walks you through a four-step configuration wizard: Getting Started, Add Sources, Assign Prospects, and Tools and that's where you handle most of the structural setup: connecting ZoomInfo, specifying the account source report, and assigning the agent.
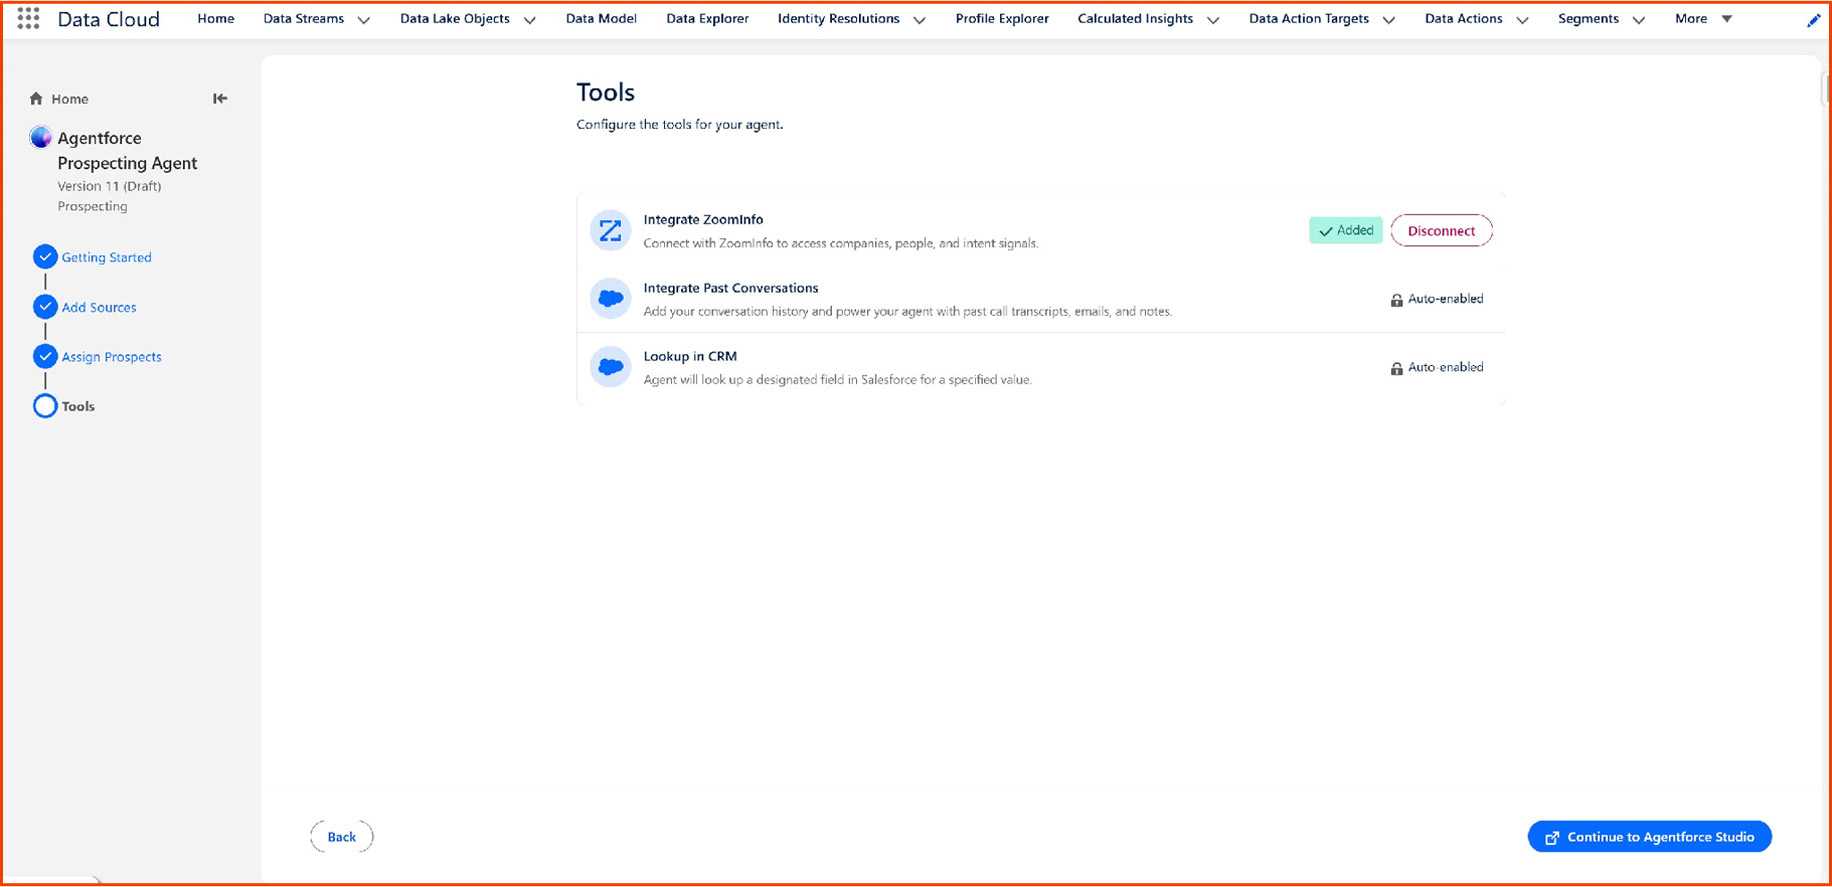
But here's what's not obvious: after completing the wizard, you still need to open Agentforce Builder and manually edit the sub-agent instructions. The wizard doesn't surface the Account Research qualification criteria or the Prospect Finder ICP configuration inline. You have to navigate into the agent's topic/sub-agent structure and modify those instructions directly.
If you skip this step, the agent runs with default logic that may not match your use case at all.
You don't need a full ZoomInfo enterprise contract to test this. A ZoomInfo free trial (the Lite variant) is sufficient for basic account enrichment and contact lookups, which covers the core Prospecting Agent workflow. For a demo or proof-of-concept, this gets you far enough to validate the end-to-end flow before committing to licensing.
The Prospecting Agent isn't a single monolithic agent, it has three distinct sub-agents, each playing a specific role in the reasoning chain. Understanding this architecture is essential because when something doesn't work, you need to know which layer to tune.
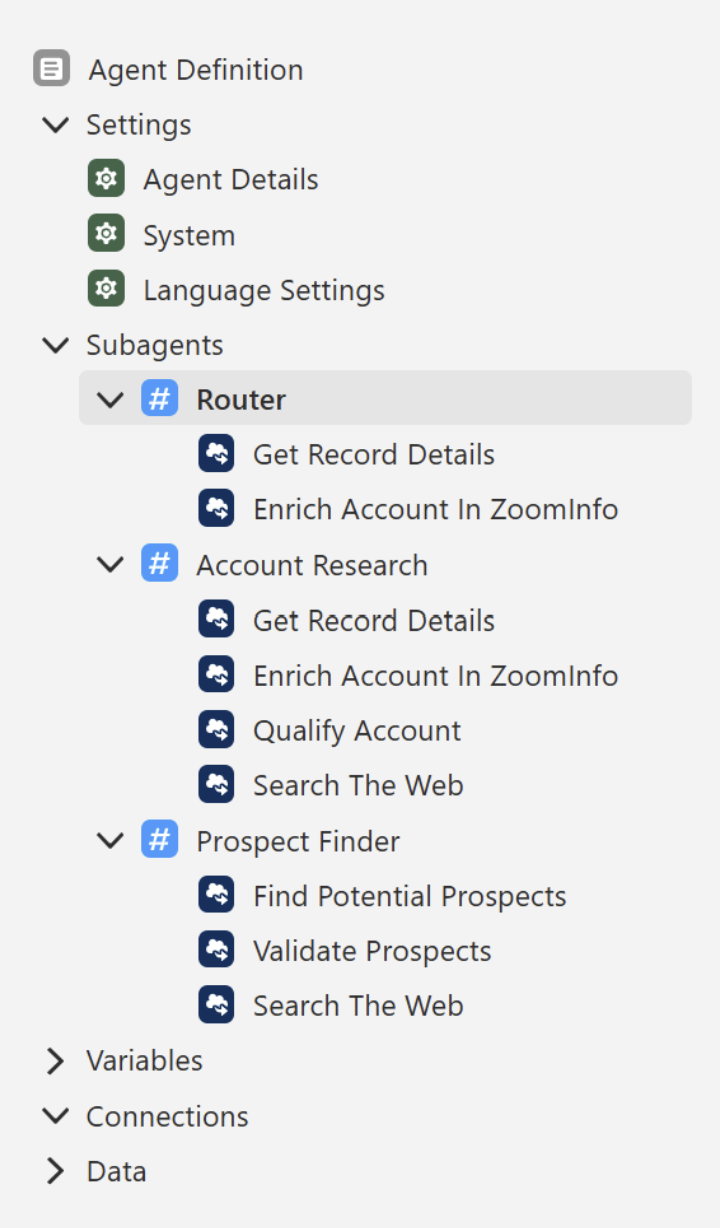
This is the entry point. When the agent is invoked from an account record, the Router sub-agent takes the initial context and classifies whether to route execution toward Account Research or Prospect Finder. It's analogous to a topic classifier in a standard Agentforce setup and like topic classifiers, its behavior is sensitive to the instructions you give it.
This sub-agent performs account-level qualification. It takes the selected account, cross-references it against your connected data sources (ZoomInfo being the primary one), and evaluates whether the account passes your Qualification Criteria.
The out-of-the-box Qualification Criteria defaults to: Account must be in the Technology industry. This is checked against both the Salesforce Account Industry field and enrichment data from ZoomInfo (industry, primarySubIndustryCode, industries fields).
There are also Nice-to-Have Criteria: Signals like recent funding rounds, product launches, or market expansion news, which are used to prioritize and enrich the agent's reasoning, but they do not act as hard filters. An account can still pass qualification even if it doesn't meet these signals.
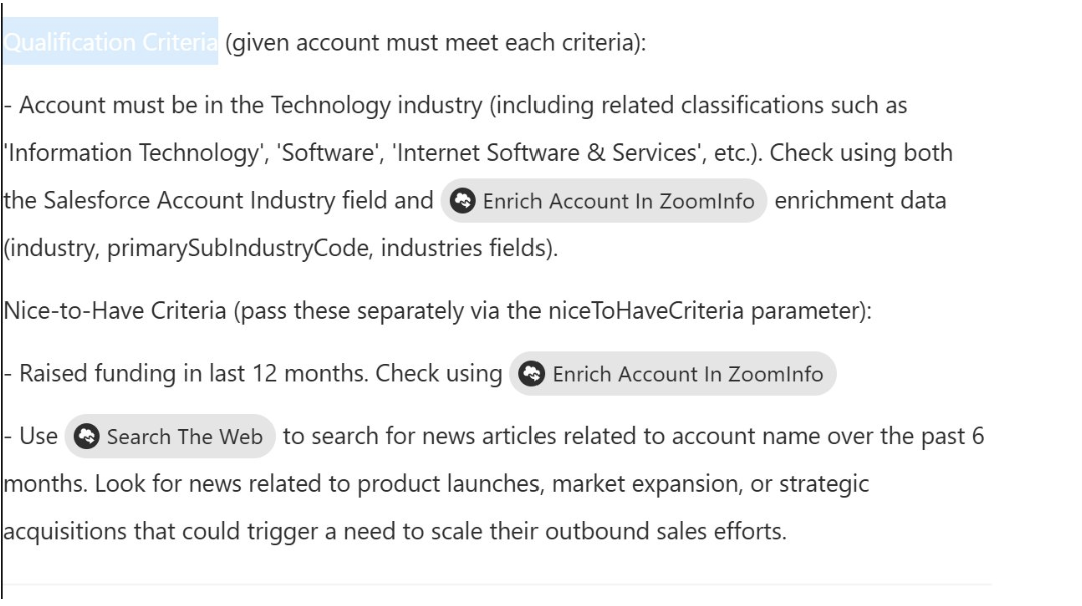
Key action required: You almost certainly need to change these default criteria to match your actual ICP. Leaving the defaults in place means the agent will apply Technology industry logic regardless of your business context.
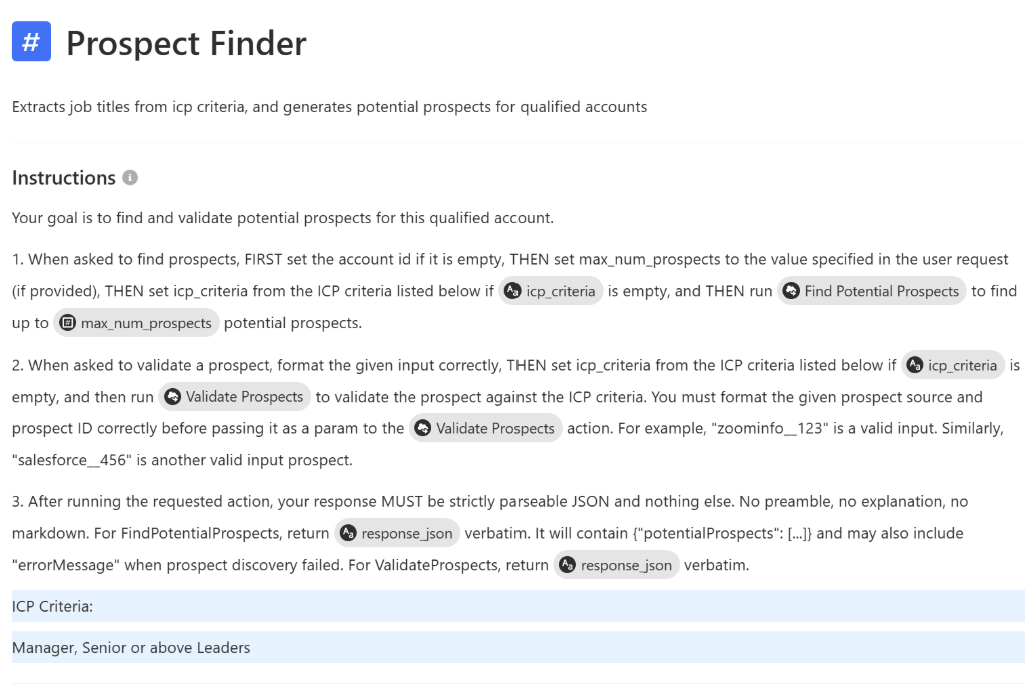
Once an account is qualified, this sub-agent identifies individual prospects at that account. It applies your ICP criteria: job title, seniority, function, to ZoomInfo's contact database and returns matching individuals. The default ICP criteria are generic placeholders. You must update these to reflect your real target persona.
Once setup is complete and the agent is active, a "Generate Prospects from Account" button appears on the Account record page layout. Clicking it opens a modal where you select the agent, assign prospects to a user, and set a maximum prospect count (default is 5).
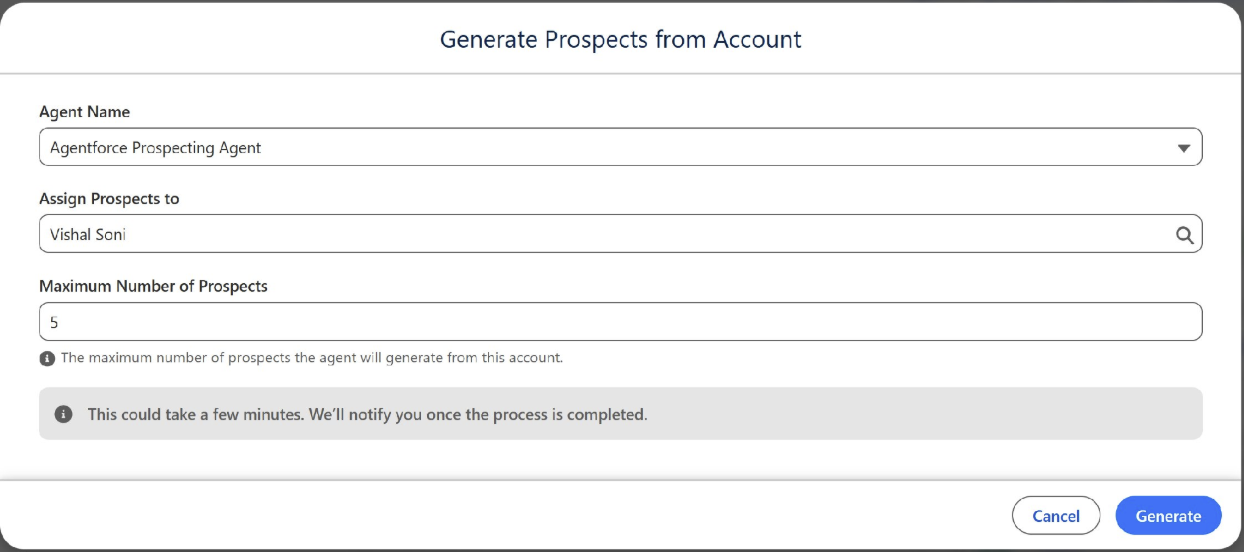
After you click Generate, the agent runs asynchronously. You'll receive a notification once the process completes.

In practice, expect anywhere from 10 to 60 seconds and in some cases, you may need to re-trigger the process if results don't appear immediately. This seems to be a timing/latency issue rather than a configuration problem; a second attempt on the same account often succeeded where the first didn't.
This is the most important thing I can tell you. After all the setup is done, the agent will silently fail to produce prospects unless three conditions are simultaneously true:
For your initial testing, pick an account you know is a real technology company with real employees in ZoomInfo, and confirm it meets whatever criteria you've defined. Also worth noting: don't try to run this on Partner accounts or Person Accounts. The agent is designed for standard B2B customer accounts only.
When everything is correctly configured, the New Prospects queue populates with a list of contacts, each accompanied by a "Why This Prospect?" explanation. The agent provides per-prospect reasoning, explaining which qualification criteria were met, which nice-to-have signals were present, and where the data came from.
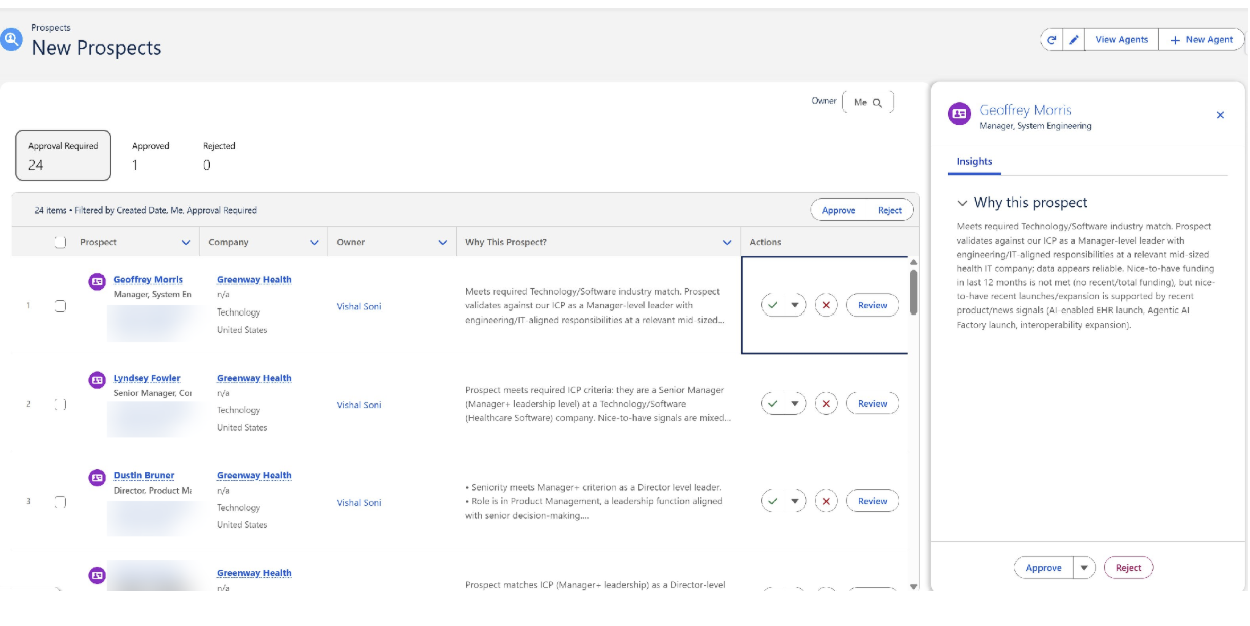
The result is a reviewable list with Approve/Reject actions per prospect, and a full Insights panel on the right that surfaces the agent's reasoning in plain language. From an architecture perspective, this transparency is genuinely useful, reps aren't accepting a black-box recommendation; they're seeing the logic and can calibrate their trust in the output.
Use this as a go/no-go reference before your first live test run:
The Agentforce Prospecting Agent can do a lot. But completing the setup wizard is not enough.
Three prerequisites need to align, one key Agentforce Builder step is easy to miss, and the default ICP criteria must be updated before the first run. Miss any of these, and the agent may look ready while doing nothing.
These configuration choices decide whether you see results on day one or spend weeks troubleshooting.
At MIDCAI, we help teams get it right, from agent configuration and ICP design to ZoomInfo integration.
Planning this for your Salesforce org? Let’s talk.
With 17+ years in data, AI, and tech consulting, I’ve worked with pioneers from IBM to IIT Kanpur. Joining MIDCAI marks a fresh chapter - where deep thinking meets meaningful execution, and curiosity leads the way in blending AI, cybersecurity, and human-centered consulting.
Get in touch with us for any enquiries and questions
Define your goals and identify areas where technology can add value to your business
We are looking for passionate people to join us on our mission.
where your skills fuel innovation and your growth powers ours